- Centralized Authentication - One login for all enterprise applications.
- Enhanced Security - Organization-controlled access.
- User Management - Centralized user provisioning and deprovisioning.
- Compliance - Meets enterprise security requirements.
- User Experience - Seamless authentication experience.
Azure AD SSO Configuration
This section outlines the steps required to configure Azure AD SSO for your EKB instance.Prerequisites
Before proceeding, you should have the following or reach out to your respective team for support:- Azure Portal administrator access.
- Microsoft 365 account with admin access.
- Your EKB instance URL.
Step 1: Azure AD application setup
-
Go to Azure Portal
Visit portal.azure.com and sign in with your administrator account. -
Open Enterprise applications
In the Azure portal, under Azure services, click Enterprise applications.
-
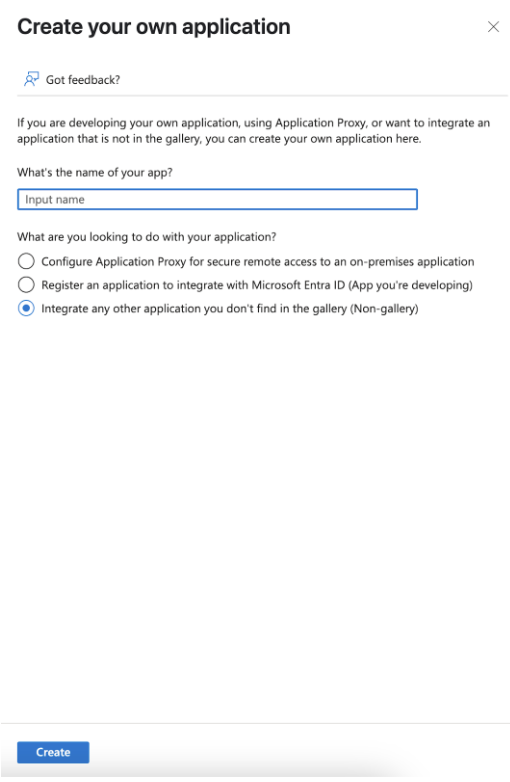
Create enterprise application
Click New application. On the Browse Microsoft Entra Gallery page, click Create your own application. In the dialog that opens, enter an application name (e.g., “EKB”), select Integrate any other application you don’t find in the gallery (Non-gallery), and click Create.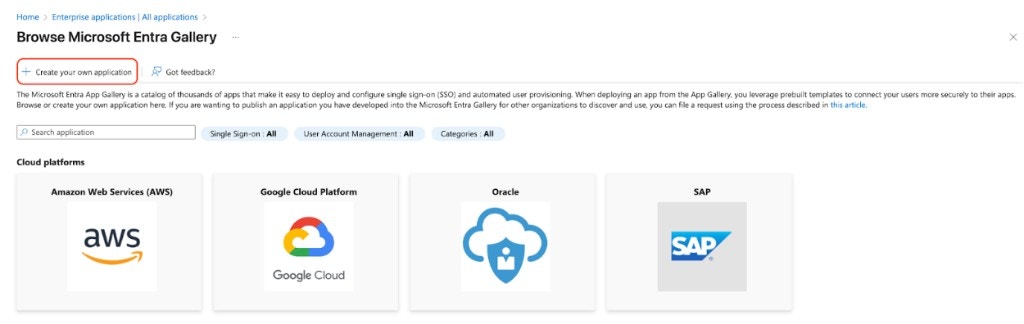
-
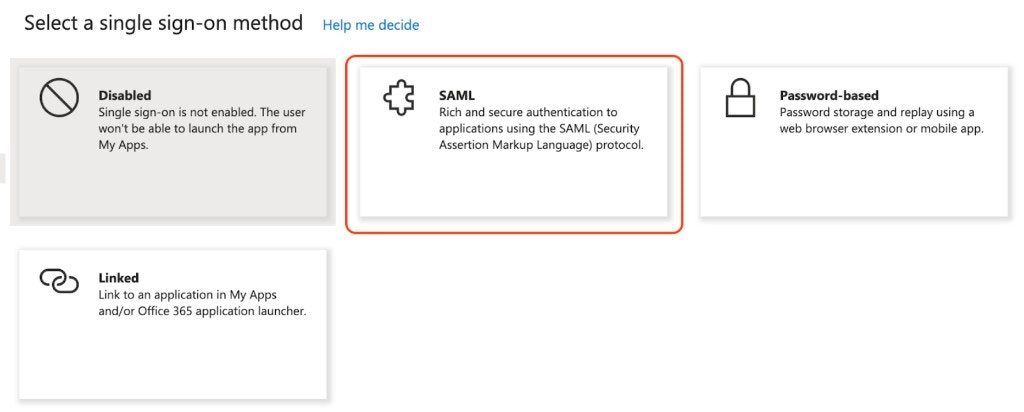
Set up single sign-on
On the application’s Getting started page, click Set up single sign on (or Get started on that card). On Select a single sign-on method, choose SAML.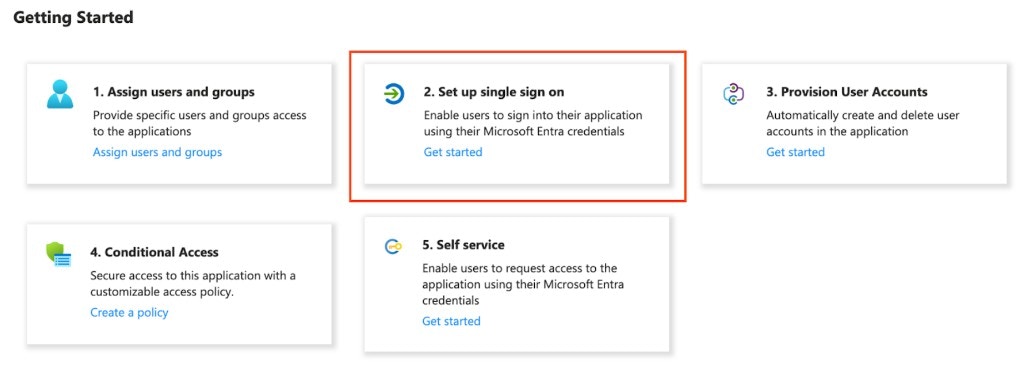
-
Configure SAML (Basic SAML Configuration)
In Basic SAML Configuration enter (for EKB Cloud use the values below):- Identifier (Entity ID):
https://api.getodin.ai/user/azure/sso/saml/acs/admin - Reply URL (Assertion Consumer Service URL):
https://api.getodin.ai/user/azure/sso/saml/acs/admin - Sign on URL: Leave empty.
- Relay State:
default - Logout URL: Leave empty.
- Identifier (Entity ID):
-
User attributes & claims
In Attributes & Claims, ensure the following mappings (click Edit to add or change):- Unique User Identifier →
user.userprincipalname - email →
user.mail - emailaddress →
user.mail - givenname →
user.givenname - surname →
user.surname - name →
user.userprincipalname - DisplayName →
user.displayname
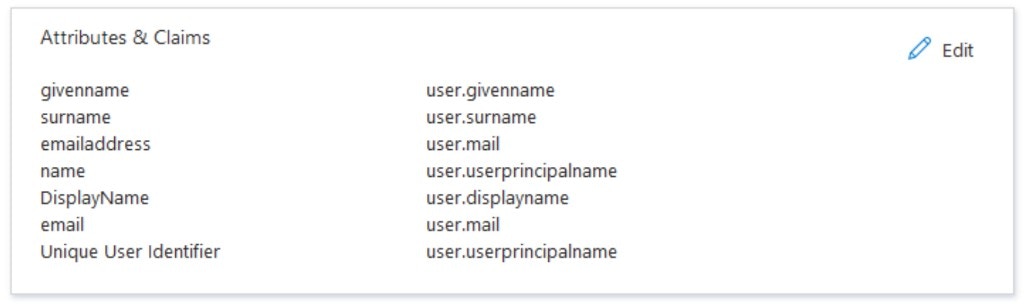
- Unique User Identifier →
-
Assign users
Go to Users and groups > Add user/group, select users or groups, and click Assign. Assigned users will sign in via SSO once configuration is complete.
Step 2: Get Azure configuration
-
Get the Metadata URL
In your application, go to Single sign-on > SAML. In the SAML Certificates section, copy the App Federation Metadata Url (use the copy icon next to it). Send this URL to EKB Support in Step 3.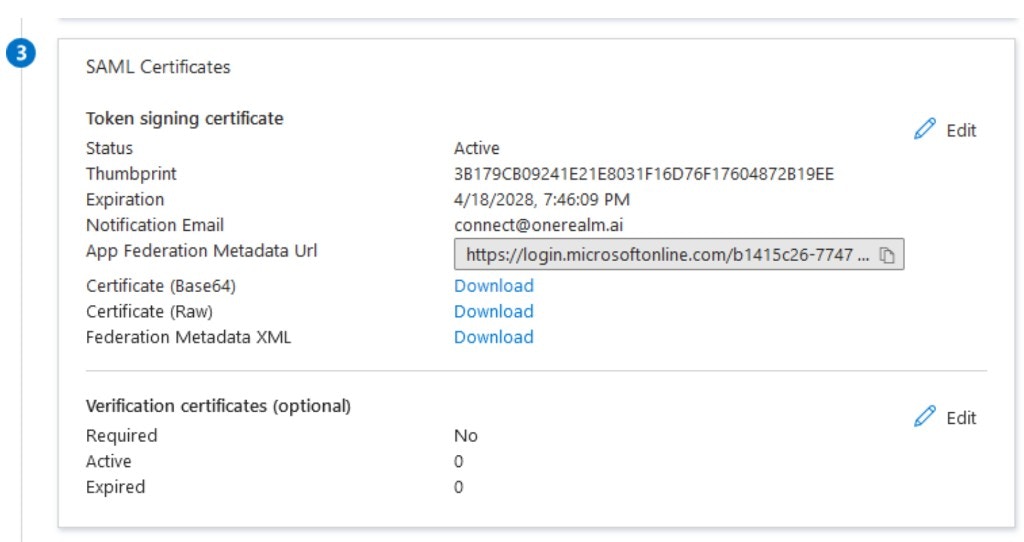
Step 3: Submit configuration to EKB
EKB’s support team will configure and test your SSO setup. Please provide the following information:-
Send Configuration Details
Email Support with the following:- Provider: Azure AD (or Azure)
- Enterprise ID: Your organization’s domain (e.g.,
company.com) - Metadata URL: The App Federation Metadata Url from Step 2
- SSO Sign-In Only (Optional): Specify if you want to require SSO for all users with this domain.
-
EKB Configuration
EKB’s support team will configure SSO on your instance and test the connection. You will be notified once configuration is complete. -
Testing
EKB’s team will test the SSO connection, and you may be asked to verify that it works. Once confirmed, SSO will be enabled for your organization.
Troubleshooting Azure AD SSO
In this section, you will find common issues and solutions related to Azure AD SSO. Issue: SAML assertion errorsSolutions:
- Verify Reply URL and Identifier (Entity ID) both match
https://api.getodin.ai/user/azure/sso/saml/acs/admin. - Ensure Relay State is
default; leave Sign on URL and Logout URL empty. - Ensure user attributes are mapped correctly.
- Verify the certificate is valid and not expired.
Solutions:
- Verify the user is assigned to the application in Azure AD.
- Check email attribute mapping.
- Ensure the user exists in EKB.
- Verify the enterprise ID matches the email domain.