Documentation Index
Fetch the complete documentation index at: https://ai-kb.automationanywhere.com/llms.txt
Use this file to discover all available pages before exploring further.
Introduction
What is the Agent Builder in EKB Platform? The Agent Builder is an advanced, enterprise-grade feature in the EKB platform specifically designed to empower organizations to create, configure, and deploy intelligent autonomous agents. Unlike standard chatbots that are constrained to simple conversational exchanges based on pre-defined scripts or limited knowledge bases, an Agent within this ecosystem is a specialized digital entity. These agents are equipped with specific instructions (personality), persistent memory, and, crucially, “Toolkits” that grant them the ability to interact dynamically with the real world, enterprise systems, and data sources. The platform operates as a robust bridge between state-of-the-art Large Language Models (LLMs) and your critical business data, software applications, and operational workflows. It significantly abstracts the technical complexity associated with prompt engineering, API integration, authentication management, and context window handling. This abstraction provides a streamlined, user-friendly interface where anyone—from technical developers to business analysts and domain experts—can construct powerful AI assistants tailored to specific business needs without writing extensive code. The value proposition of the Agent Builder Platform lies in its ability to transform AI from a passive information retrieval tool into an active participant in business processes. By enabling agents to perform actions—such as querying databases, generating documents, sending emails, and executing code—organizations can automate complex, multi-step workflows that previously required human intervention. This shift from “chatting with AI” to “working with AI agents” represents a fundamental evolution in enterprise productivity and automation.Platform Architecture & Overview
The architecture is built on a modular, four-layer system designed for scalability, security, and flexibility:- Core Intelligence Layer: This foundational layer is powered by the selected Large Language Model (e.g., GPT-5 Series, Claude 3.5 Sonnet, Gemini 3). It handles the heavy lifting of cognitive processing, including reasoning, language understanding, context synthesis, and decision-making logic. It is the “brain” that interprets user intent and formulates plans.
- Tooling Layer (The “Arms and Legs”): This operational layer connects the core intelligence to external systems and the physical world. It includes a comprehensive suite of native toolkits for executing code, browsing the web, querying databases, and manipulating files. It translates the LLM’s intent into concrete API calls and system commands.
- Integration Layer: This connectivity layer enables seamless interaction with the enterprise software ecosystem. It features a vast library of pre-built, secure connectors for major third-party services like Salesforce, Microsoft 365, Jira, ServiceNow, and more. It manages API endpoints, data formats, and protocol negotiation.
- Orchestration Layer: This management layer oversees the entire lifecycle of an interaction. It manages the flow of data between the user, the agent, and the tools, handling critical functions such as authentication, error recovery, state management, and multi-agent delegation. It ensures that complex, multi-step tasks are executed reliably and securely.
Key Capabilities
The Agent Builder Platform offers a distinct set of capabilities that differentiate it from standard AI interfaces:- Custom Personalities: Administrators can define rigid behavioral constraints and persona definitions. An agent can be configured to strictly adhere to specific communication styles, such as a formal compliance officer, a creative marketing copywriter, or an empathetic customer support representative, ensuring brand consistency.
- Retrieval Augmented Generation (RAG): The platform natively integrates vector database technology to handle document ingestion and retrieval. Users can simply upload documents (PDFs, DOCX, TXT), and the agent automatically gains the ability to perform semantic searches and reference this specific knowledge base during conversations, grounding its answers in verified data.
- Real-time Web Access: Agents are not limited to the static training data of their underlying LLMs. They possess the capability to browse the live internet securely to fetch real-time stock prices, breaking news, competitor data, or regulatory updates, ensuring that their responses are always current and relevant.
- Secure Code Execution: For tasks requiring mathematical precision, data transformation, or algorithmic logic, agents can write and execute Python or Node.js code in secure, isolated sandboxes. This capability allows for on-the-fly generation of charts, complex analysis of Excel files, data cleaning, and simulation modeling.
- Enterprise Integration: The platform supports robust OAuth 2.0 authentication protocols for services like Microsoft 365 and Google Workspace. This means the agent acts on behalf of the user, respecting all existing permission structures, access controls, and security policies defined within the organization.
- Visualizations: The system includes an intelligent visualization engine that can automatically detect when data is best presented visually. It can render interactive charts (Bar, Pie, Line, Scatter) directly within the chat interface, transforming raw data tables into actionable visual insights instantly.
Use Cases Across Industries
| Industry | Scenario |
|---|---|
| Finance | Agents that query SQL databases to generate daily P&L reports, visualize market trends, and perform risk analysis on portfolio data. |
| HR | ”Resume Screener” agents that read PDF applications, compare them against job descriptions in the Knowledge Base, draft rejection or interview emails, and schedule meetings. |
| Software Development | ”PR Reviewer” agents that analyze GitHub pull requests, check for code style violations, suggest optimizations, and automatically generate documentation updates. |
| Sales | ”Lead Enrichment” agents that take a prospect’s email, search the web for their company details, look them up in Salesforce, identify decision-makers, and draft personalized outreach emails. |
| Customer Support | Tier-1 support agents that can reset passwords in Azure AD, check order status in Odoo ERP, troubleshoot common issues using knowledge base articles, and escalate complex tickets to Jira with full context. |
Getting Started
Creating a New Project
The fundamental unit of organization and collaboration in the Agent Builder is the Project. A project acts as a secure, isolated container for all resources related to a specific business function, team, or initiative. Within a project, you manage Agents (the AI assistants themselves), Knowledge Bases (files and documents specific to this workspace), Documents (text files created or managed by the agents), and Databases (connections to SQL or Smart Tables). Creating a project establishes a dedicated workspace with its own settings, permissions, and resource quotas. This isolation is crucial for maintaining data security and organizing workflows, especially in large enterprises with multiple departments. To create a new project, simply click the ”+” icon in the sidebar. You will be prompted to name your project (e.g., “HR Automation”, “Q3 Financial Analysis”). Once created, you enter the project workspace where you can begin adding agents and resources.Agent Creation Methods
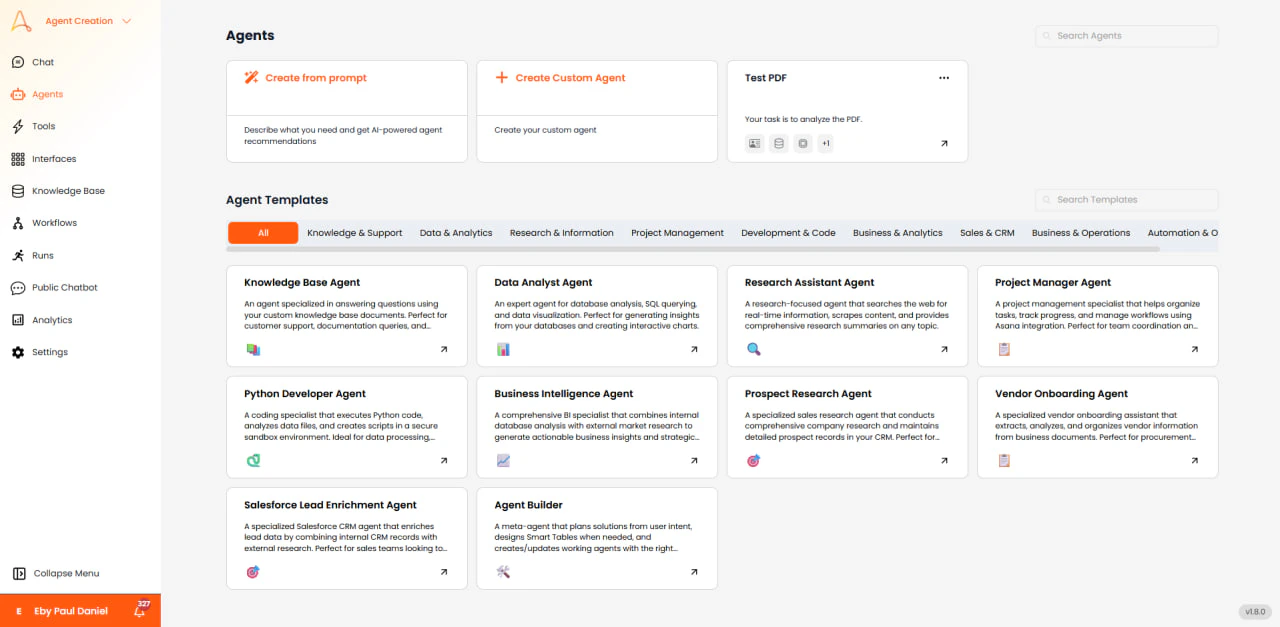
From the main dashboard, clicking “Create Agent” presents two primary pathways, catering to different user expertise levels: Create from Prompt (AI-Assisted) This is the fastest and most accessible way to get started, ideal for users who are new to prompt engineering or want to prototype quickly. You describe your intent in natural language. For example: “I need an assistant that can help me research competitor pricing on the web and save the data into a Google Sheet.” The system analyzes your request using a specialized meta-prompt and automatically configures the agent. It selects an appropriate name (e.g., “Market Research Assistant”), writes a comprehensive system prompt defining the persona and objectives, and enables the necessary toolkits (Web Search, Google Sheets) required to fulfill the request. Create Custom Agent (Manual) For advanced users, prompt engineers, and developers, this option provides full granular control over every aspect of the agent’s configuration. You manually configure the Name & Icon for branding, select the specific LLM version based on performance needs, manually toggle the specific integrations and toolkits required, and write the detailed system instruction from scratch to fine-tune behavior. This method is recommended for production-grade agents where precise control over behavior and capabilities is paramount.Agent Templates
To accelerate development and standardize best practices, the platform offers a rich library of pre-configured templates. These are “blueprints” for common use cases, coming with optimized pre-written prompts and pre-selected tool configurations.- Knowledge & Support: Includes “Knowledge Base Agent” (pre-configured for RAG, ideal for policy QA) and “Customer Service Rep” (tuned for empathy, de-escalation, and support protocols).
- Data & Analytics: Includes “Data Analyst” (equipped with Python and Database tools for complex analysis) and “SQL Reporter” (specialized in writing accurate, optimized SQL queries).
- Research: Includes “Research Assistant” (configured with Web Search and academic sourcing rules) and “Market Analyst” (focuses on competitor data aggregation and trend analysis).
- Project Management: Includes “Agile Scrum Master” (integrated with Jira/Asana to manage sprints, standups, and backlog refinement).
- Development: Includes “Python Developer” (a coding assistant with file system access and debugging capabilities) and “QA Automation” (scripts tests and reports bugs).
- Business Operations: Includes “Vendor Onboarding” (guides users through compliance checklists) and “Financial Analyst” (connects to Excel and Yahoo Finance for market tracking).
Dashboard Navigation Guide
Once inside a project, the interface is expertly designed for productivity, divided into three main areas:- Left Sidebar (Navigation): Provides quick access to the core modules: Chat interface, Agent Settings configuration, Knowledge Base management, and Integrations setup. It serves as the primary navigation controller for the project.
- Center Panel (Chat/Canvas): The main interaction area where you converse with the agent, view its outputs, and visualize data. This is the “runtime” environment where the agent executes tasks and presents results.
- Right Panel (Context/Settings): Displays active tool configurations, file uploads, and specific parameters for the current session. It provides context-aware controls and information relevant to the current task or selected agent.
Basic Agent Configuration
Agent Identity Setup
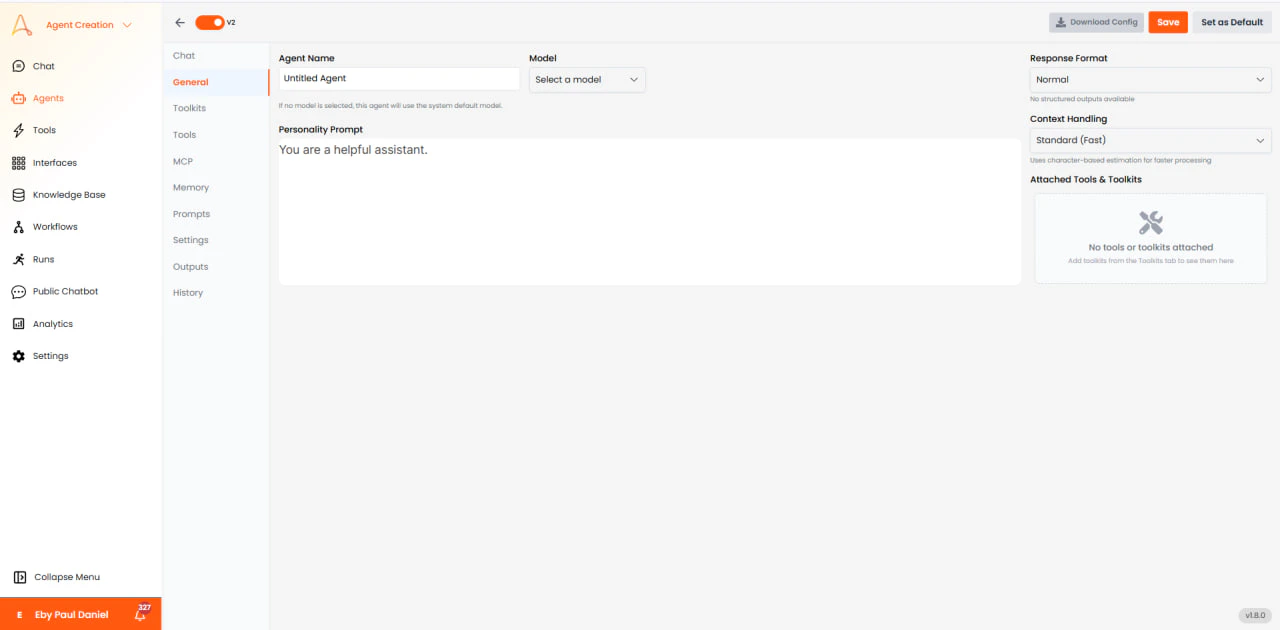
The “General Settings” tab is the control center for your agent’s identity and cognitive architecture. Correctly configuring these settings is crucial for user adoption and performance.- Agent Name: A user-facing identifier. Best practice is to use clear, descriptive names like “IT Helpdesk Bot” or “Sales Assistant” rather than generic names like “Bot 1 ”. The name helps users understand the agent’s specific function.
- Personality Prompt: Instructions that define the agent’s behavior, tone, role, and operational guidelines. It governs how the agent responds and interacts during conversations, shaping its communication style, constraints, and overall conduct.
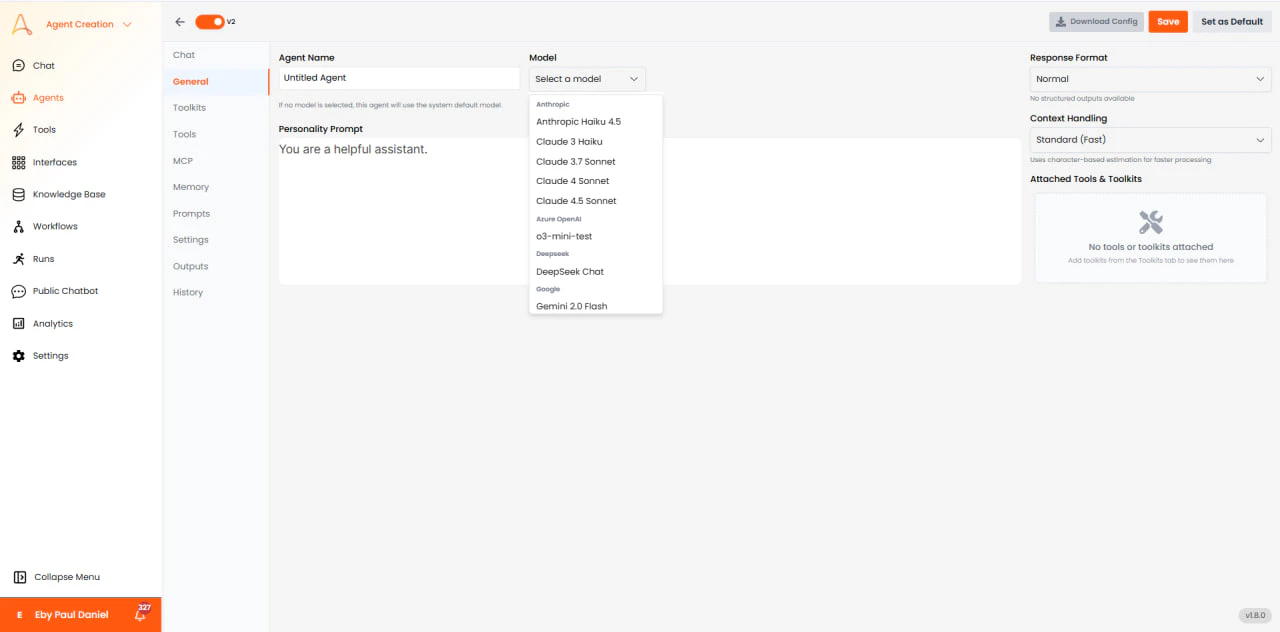
Model Selection Strategy
The platform supports a multi-model architecture, allowing you to choose the optimal brain for your agent. Choosing the right model involves balancing intelligence capabilities, reasoning speed, and operational cost.| Model Family | Specific Models | Best For Certain Tasks | Key Features |
|---|---|---|---|
| OpenAI GPT-5 Series | GPT-5.2 Codex, GPT-5.1 Codex Max, GPT-5 (Thinking) | State-of-the-art reasoning, advanced coding tasks, complex multi-step problem solving. | Leading performance across benchmarks as of Feb 2026. Superior instruction following. |
| Anthropic Claude 4 | Claude Opus 4.6, Claude Opus 4.5, Claude 4.5 Sonnet | Superior coding (80.9% on SWE-bench), creative writing, massive context windows. | Strict instruction following, nuanced writing style, minimal hallucinations. |
| Google Gemini 3 | Gemini 3 Pro, Gemini 2.5 Pro | Advanced multimodal understanding (images/video/audio), extremely large context windows. | 2M+ tokens context, real-time analysis, strong coding performance. |
| OpenAI Reasoning | o3, o3-pro, o4-mini | Complex logical reasoning, advanced mathematics, scientific problem-solving. | Extended “thinking time” produces superior results for logic puzzles and math. |
| DeepSeek | DeepSeek-R1 , DeepSeek-V3.2, DeepSeek-V3 | Cost-efficient reasoning, general-purpose AI with superior coding. | R1 matches o1 -level performance; V3 is highly cost-effective for general tasks. |
| Cost-Optimized | GPT-4.1 mini, Claude Haiku, Gemini Flash, o4-mini | High-speed tasks, classification, summarization, high-throughput applications. | Lowest cost per token, fastest response times, ideal for simple tasks. |
Personality Prompts
The System Instruction (or Personality Prompt) is the most powerful configuration lever available. It defines the “soul” of the agent, governing its tone, behavior, and decision-making framework. A well-crafted prompt ensures reliability and consistency.- Role Definition: Clearly state who the agent is. Example: “You are an expert Senior Python Developer.”
- Task Definition: Define the primary objective. Example: “Your goal is to review code snippets and suggest performance optimizations.”
- Constraint Setting: Set boundaries on behavior. Example: “Do not explain basic concepts. Focus only on advanced patterns.”
- Format Specification: Define how the output should look. Example: “Output your response in Markdown with code blocks.”
- Tooling Guidance: Instruct on tool usage. Example: “Always verify your code by running it in the sandbox before responding.”
Response Configuration Options
These settings control the technical format and creativity of the agent’s output:- Response Format:
- Text (Default): Standard conversational output.
- JSON Object: Forces the agent to output a valid JSON structure. Essential for programmatic integrations where the agent’s output is fed into another system.
Advanced Agent Features
Beyond the basic configuration, EKB provides several advanced features to enhance agent capabilities, manage workflows, and optimize performance. These features give you fine-grained control over agent behavior and integration capabilities.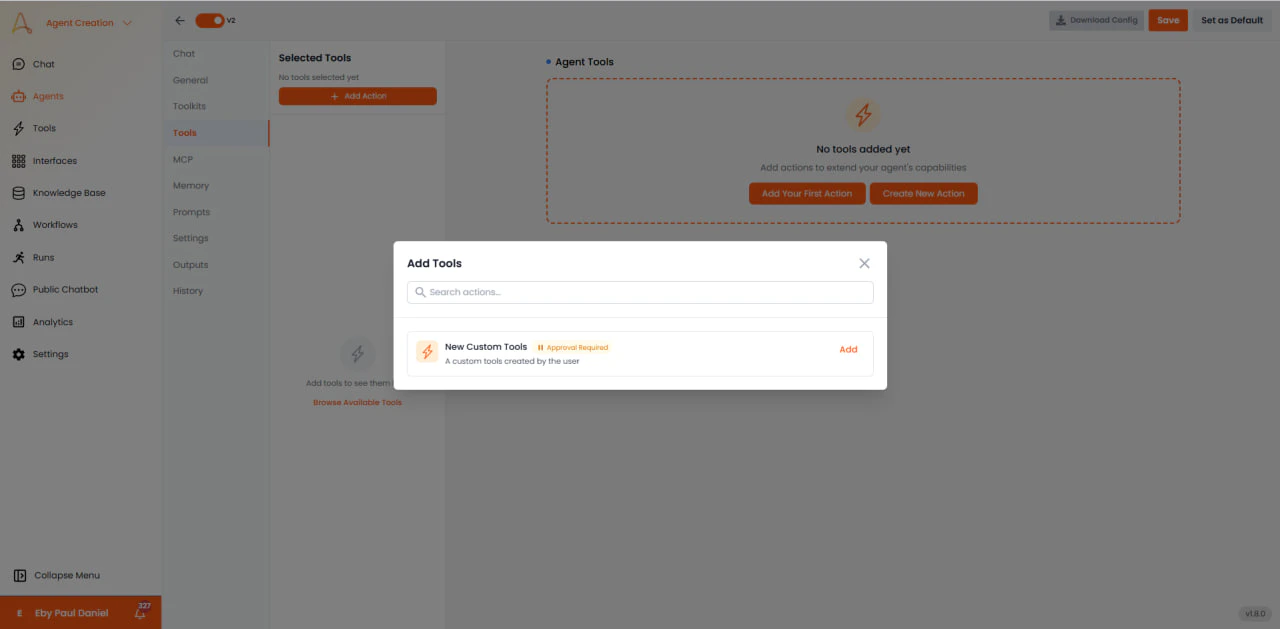
Custom tools
The Tools section allows you to extend your agent’s capabilities beyond built-in toolkits by adding custom actions and workflows. This feature is essential for integrating proprietary APIs, custom business logic, or specialized operations unique to your organization. Key Features:- Add Your First Action: Select an action previously created to reuse existing functionality and integrate it into a workflow efficiently.
- Create New Action: Build new tools from scratch or define custom actions with full control over parameters, inputs, outputs, and authentication. Optionally, enable an approval workflow for sensitive operations, adding an extra layer of security and governance.
- Internal API Integration: Connect to proprietary company APIs not available in standard toolkits.
- Custom Business Logic: Implement specialized calculations, validations, or workflows specific to your business.
- Third-Party Services: Integrate with niche services or legacy systems through custom API calls.
- Data Transformation: Create tools for specific data processing or transformation tasks.
MCP Servers (Model Context Protocol)
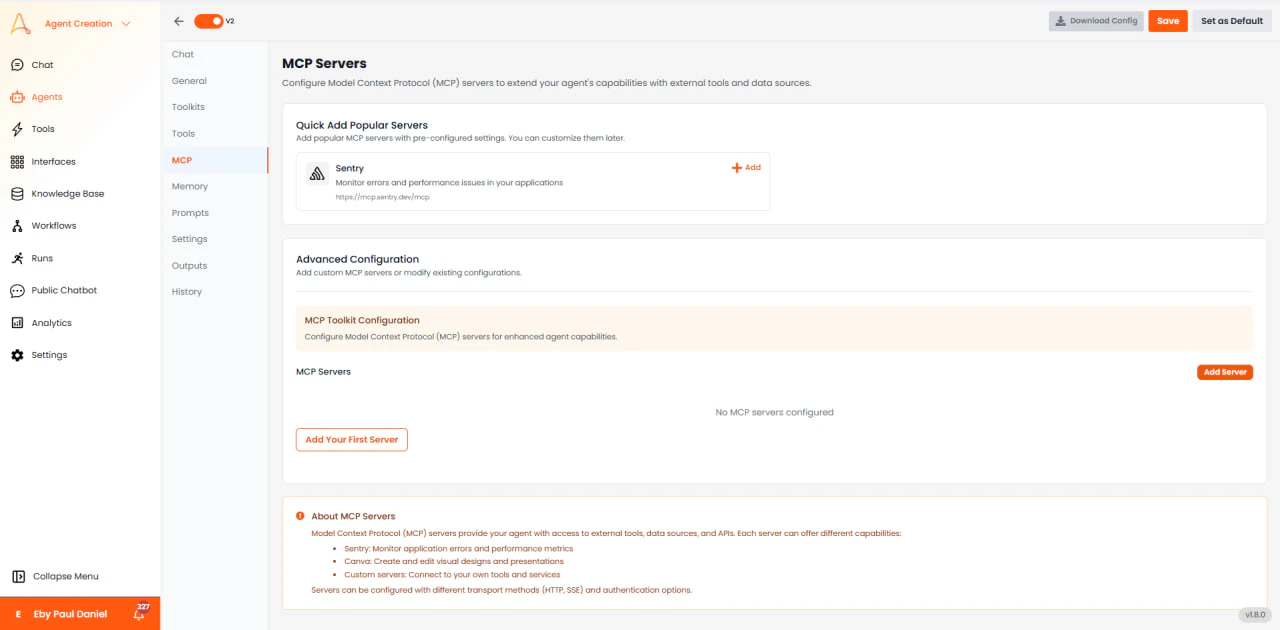
- Sentry: Monitor errors and performance issues in your applications directly from agent interactions. Agents can query error logs, track performance metrics, and help diagnose issues.
- Pre-configured Settings: Popular servers come with optimized default configurations, making integration as simple as clicking “Add”.
- Custom MCP Servers: Add custom MCP servers or modify existing configurations to fit specific requirements.
- MCP Toolkit Configuration: Configure Model Context Protocol (MCP) servers for enhanced agent capabilities.
- Server Management: Monitor server status, manage connections, and troubleshoot integration issues.
- Multiple Protocols: Servers can be configured with different transport methods (HTTP, SSE) and authentication options.
- Access to external tools and APIs through standardized protocol
- Enhanced agent capabilities with monitoring and observability tools
- Simplified integration with popular developer services
- Custom server support for proprietary systems
Agent Memory
Agent Memory allows your agent to remember user preferences, past interactions, and contextual information across conversations. This feature creates a more personalized experience by enabling the agent to recall important details and maintain continuity in long-term interactions. Memory Management Features: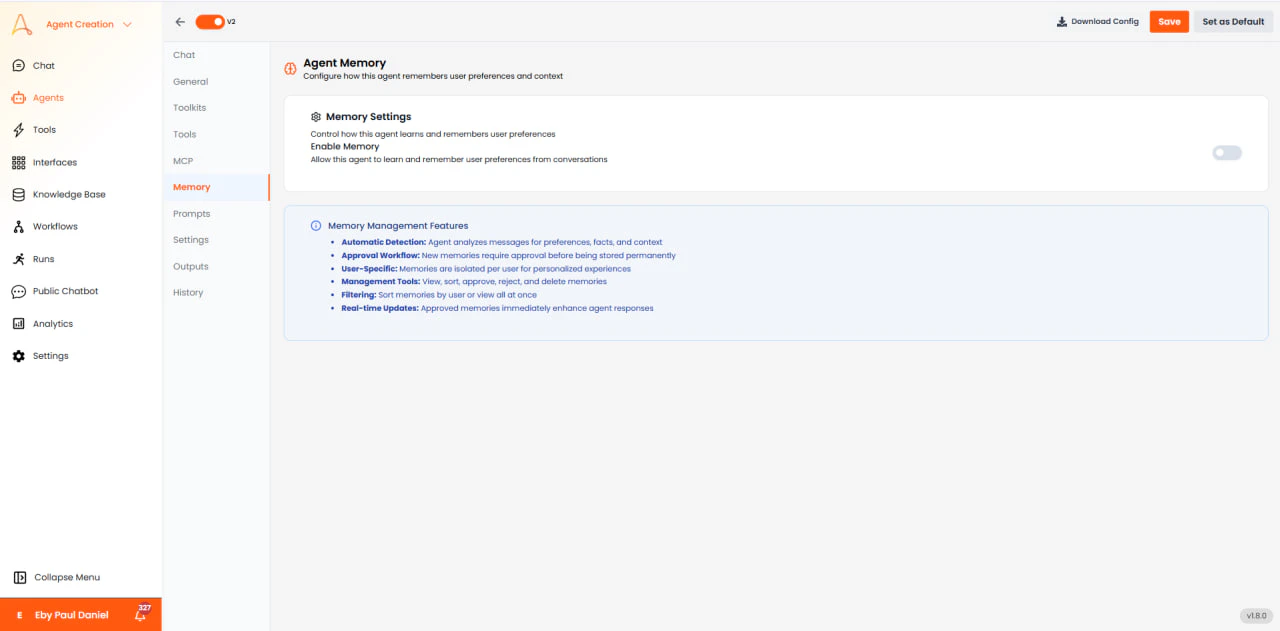
- Automatic Detection: The agent automatically identifies and stores important information from conversations, such as user preferences.
- Approval Workflow: New memories require approval before being stored permanently, giving users control over what information is retained. User-Specific: Memories are isolated per user, ensuring privacy and personalized experiences for each individual.
- Management Tools: View, edit, approve, reject, and delete memories through an intuitive interface.
- Filtering: Sort memories by user, view all at once.
- Real-time Updates: Approved memories immediately enhance agent responses.
- Personal Assistants: Remember user preferences, schedules, and frequently used settings.
- Customer Support: Recall past issues, solutions, and customer-specific information.
- Sales Agents: Remember client preferences, purchase history, and communication styles.
- Project Management: Maintain context about ongoing projects, team members, and priorities.
Prompt Library

- Quick Access: Users can select prompts from a dropdown in the message input for rapid task initiation.
- Customizable: Create, edit, and delete prompts as needed for different workflows and use cases.
- Agent-Specific: Each agent can have its own unique prompt library tailored to its role and capabilities.
- Easy Management: Drag to reorder, edit inline, or delete with one click.
- “Analyze the attached file and summarize key findings”
- “Generate a weekly status report for the current project”
- “Search the knowledge base for information about [topic]”
- “Create a task in Jira for the bug described below”
- Reduces typing and ensures consistent query formatting
- Helps users discover agent capabilities through suggested prompts
- Improves agent response quality by using optimized prompt structures
- Accelerates common workflows and repetitive tasks
Prompt Settings
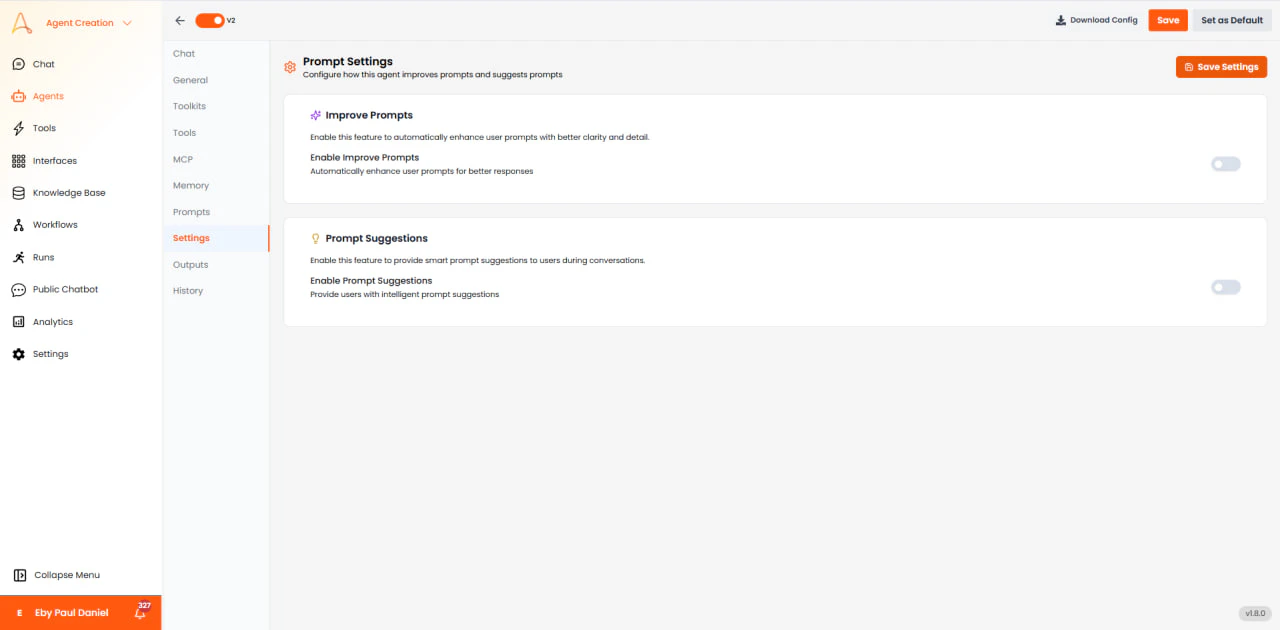
- Automatic Enhancement: When enabled, the system can analyzes user prompts on chat and enhance them with better clarity and detail before sending to the agent.
- Optimization: Adds context, clarifies ambiguous terms, and structures queries for better agent comprehension.
- Transparency: Users can see how their prompts are improved, learning better prompt engineering over time.
- Intelligent Recommendations: Provides users with smart prompt suggestions during conversations based on context and agent capabilities.
- Contextual: Suggestions adapt based on the current conversation topic and recent interactions.
- Discoverable: Helps users learn what the agent can do by showing relevant suggestions at appropriate moments.
- Improved response quality through better-structured prompts
- Reduced user frustration by guiding them toward effective queries
- Educational tool for learning prompt engineering best practices
- Enhanced agent performance by ensuring clear, well-formed inputs
Structured Outputs
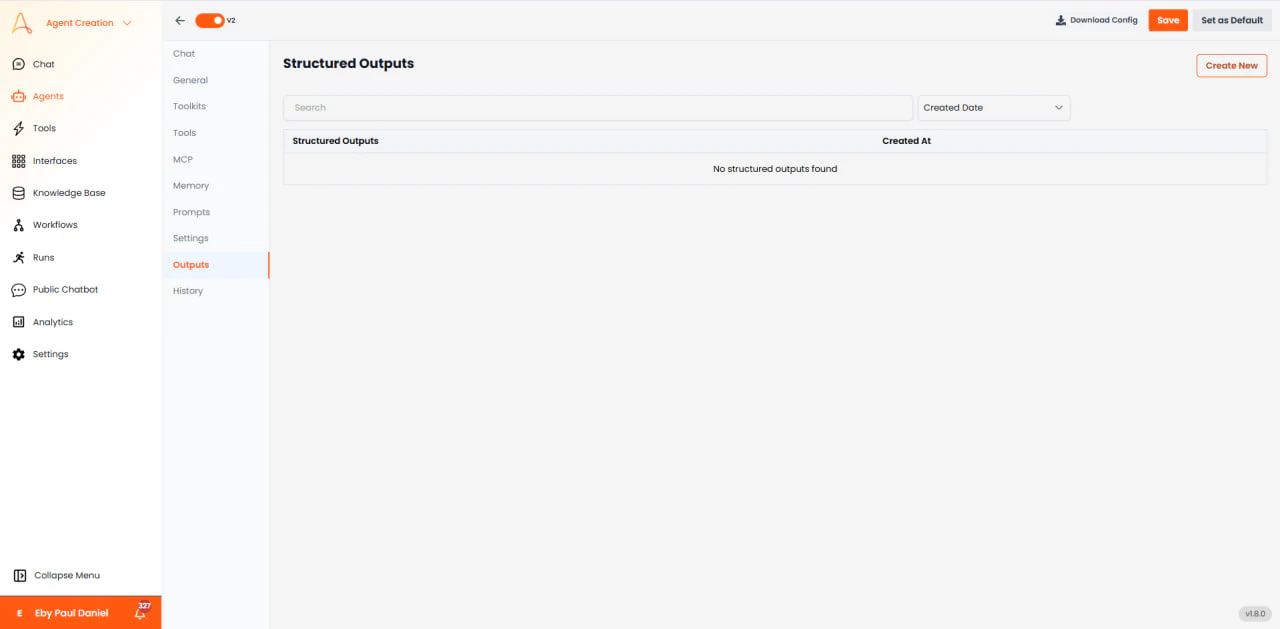
- Schema Definition: Create custom JSON schemas that define the exact structure of agent outputs.
- Type Safety: Ensure responses conform to specific data types (strings, numbers, booleans, arrays, objects).
- Required Fields: Specify which fields must always be present in the output.
- Validation: Automatic validation ensures outputs match the defined schema before being returned.
- Multiple Schemas: Create different output schemas for different agent tasks or workflows.
- API Integration: Generate responses that can be directly consumed by external APIs or microservices.
- Database Operations: Ensure agent outputs are formatted correctly for database insertion.
- Form Filling: Structure data extraction from documents into predefined form fields.
- Reporting: Generate consistent report structures that can be automatically processed.
- Data Pipelines: Feed agent outputs into downstream data processing systems.
Version History

- Complete History: View all configuration changes with timestamps and user attribution.
- Version Comparison: Compare different versions to see exactly what changed.
- Rollback Capability: Quickly revert to a previous working configuration if issues arise.
- User Attribution: Track who made each change for accountability and compliance.
- Troubleshooting: Identify when issues were introduced by comparing version changes.
- Compliance: Maintain audit trails for regulatory requirements.
- Collaboration: Track changes made by team members in shared agent development.
- Experimentation: Safely test configuration changes knowing you can roll back if needed.
- Documentation: Maintain a history of agent evolution and configuration decisions.